I’ve spent years frustrated with IR control in my smart home. Every solution was either a clunky, cobbled-together mess of components, or some cloud-dependent IR blaster that phones home to servers in who-knows-where. So I finally did something about it: I built my own.
Meet OpenIRBlaster: an open-source universal IR receiver and transmitter I designed specifically for Home Assistant and ESPHome. And honestly? It works really well. I’m excited to share it with the community that’s taught me so much.
The Problem with IR in Home Automation
If you’ve shopped for WiFi-enabled IR blasters, you know the landscape: cheap Chinese devices with terrible firmware that needs to be reflashed immediately, bargain-bin components, and questionable apps with privacy practices you’d rather not think about. Even after reflashing with custom firmware, you’re left cobbling together a solution that’s anything but seamless.
And once you do get something working with Home Assistant? Learning IR codes, managing raw hex values, and keeping track of which codes go with which device quickly becomes a mess. The standard ESPHome IR components work, but there’s no universal, end-to-end solution that makes setup and daily use actually easy.
I wanted something different: quality hardware with an open, flexible software stack that’s simple to set up and use.
What is OpenIRBlaster?
OpenIRBlaster is a purpose-built hardware and software solution that includes:
- Custom PCB – A dedicated circuit board designed around the ESP8266, featuring a transistor driven IR LED output for excellent range and a quality IR receiver for learning codes
- ESPHome Firmware – Clean, maintainable configuration that integrates seamlessly with Home Assistant
- HACS-Installable Home Assistant Integration – A custom integration (installable via HACS) that dramatically simplifies IR code management. Give the code a name, press learn in Home Assistant, point your remote at the OpenIRBlaster, and press the button to learn—the integration automatically creates a named entity you can use in automations or call directly
Key Features
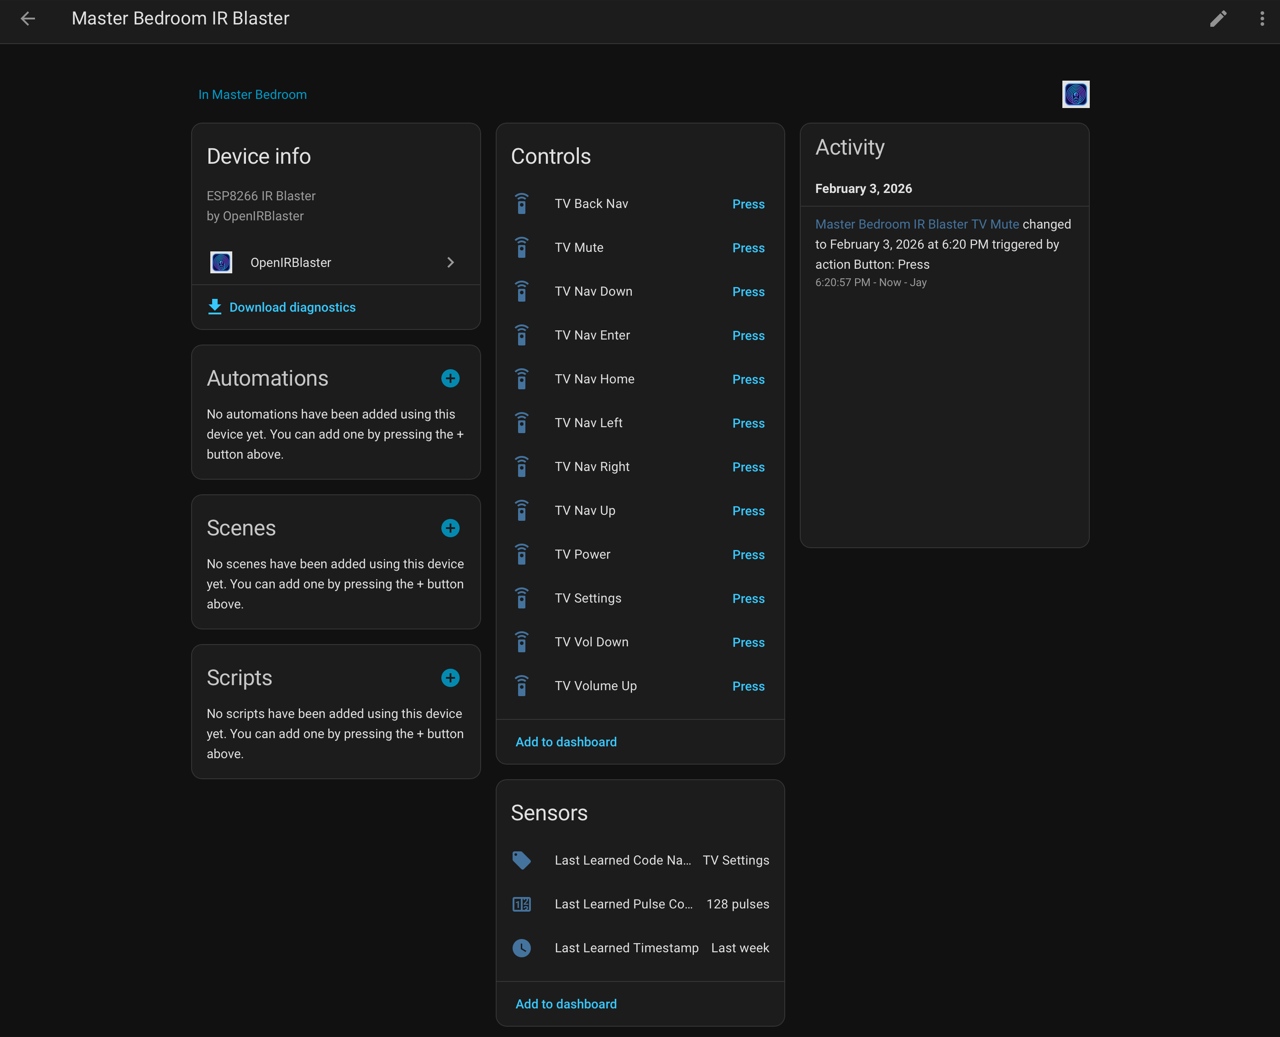
Simple Code Learning: The HACS integration includes a streamlined learning workflow. Point any remote at the device, press a button, and the code is captured. Give it a friendly name like “Living Room TV – Power” and the integration automatically creates a corresponding Home Assistant entity. No copying hex codes, no manual configuration—just name it and use it.
Organized Code Management: All your learned codes become proper Home Assistant entities, organized and ready for use in automations, scripts, dashboards, or voice assistants. The integration handles all the backend complexity so you can focus on what matters: controlling your devices.
Reliable Transmission: The transistor driven IR LED circuit provides strong output for reliable device control, even across larger rooms.
Both Transmit and Receive: Learn codes from existing remotes AND send commands to your devices—all from one compact unit.
Compatibility & Flexibility
OpenIRBlaster is designed as a holistic, end-to-end solution, but it’s also built with flexibility in mind. The HACS integration communicates with the device via ESPHome’s native API, so technically any ESPHome-based IR device with the right services could work.
If you’re using the official firmware on official hardware, everything works automatically. The technical detail: the integration identifies compatible devices by checking for project.name: “jaycollett.openirblaster” in the ESPHome config. DIY builders using custom hardware can either include this identifier or fork the integration to support their own project name.
This approach ensures the integration only tries to manage devices it’s designed to work with, while still leaving the door open for the DIY crowd to adapt things to their needs.
Design Decisions
When I set out to build this, I had specific goals that drove every hardware choice:
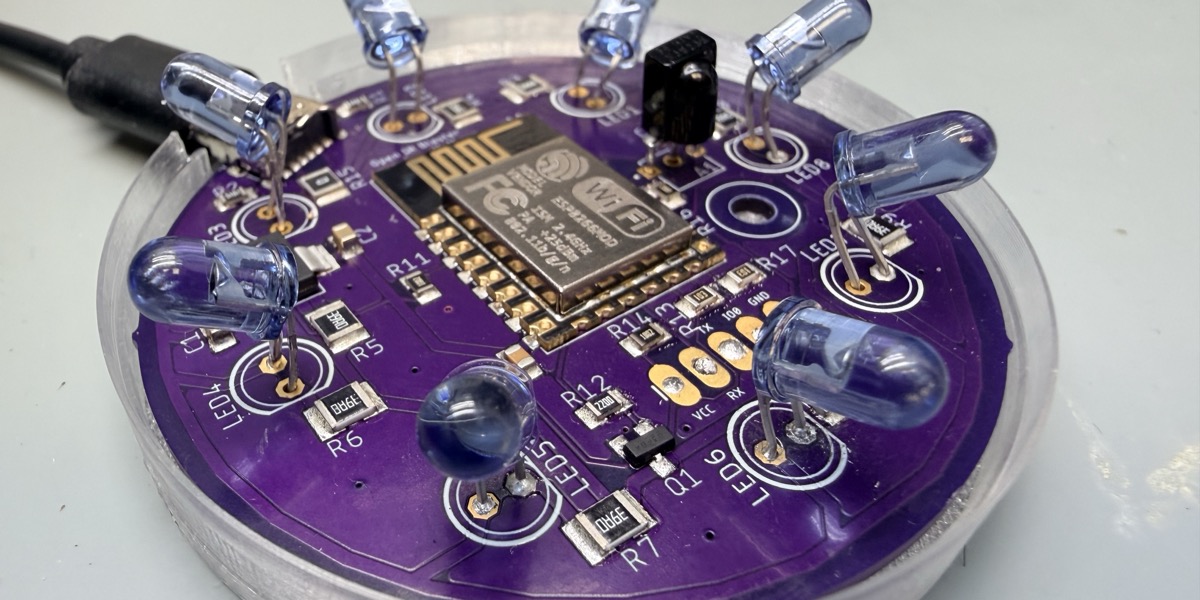
- 360-Degree Coverage: Most IR blasters point in one direction and hope for the best. OpenIRBlaster uses multiple IR LEDs arranged to provide coverage in all directions. No more carefully aiming the device or hoping line-of-sight works out—just place it somewhere central and it can reach devices throughout the room.
- The “Blaster” in the Name: Each IR LED is driven at up to ~100mA during transmit peaks. That’s significantly more current than the typical 20mA you’d get from a basic GPIO pin, and it’s why I didn’t just slap an IR LED directly on the ESP8266. This kind of output punches through ambient IR noise and reliably reaches devices across larger rooms.
- Single MOSFET, Multiple LEDs: The IRLML6344TRPBF MOSFET was chosen specifically for this application. It can handle the combined current of all the IR LEDs simultaneously while being switched by a single GPIO pin. This keeps the design simple: one control signal fires all transmitters at once for maximum coverage.
- Proper USB-C Power: Rather than just wiring up a USB connector and hoping for the best, the board includes the proper pull-down resistors on the CC pins to correctly negotiate power from USB-C sources. This ensures reliable 5V delivery from any compliant USB-C power source.
- Power Recommendation: Because of the current demands when driving multiple IR LEDs at full power, I recommend using at least a 1A USB power adapter rather than a computer USB port. Computer USB ports typically max out at 500mA, which may not be sufficient during sustained IR transmission. A basic phone charger or dedicated USB adapter will work perfectly.
Hardware Details
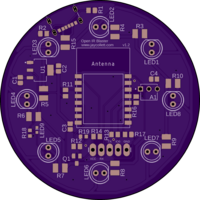
OpenIRBlaster PCB (top side) – Click to order from OSHPark
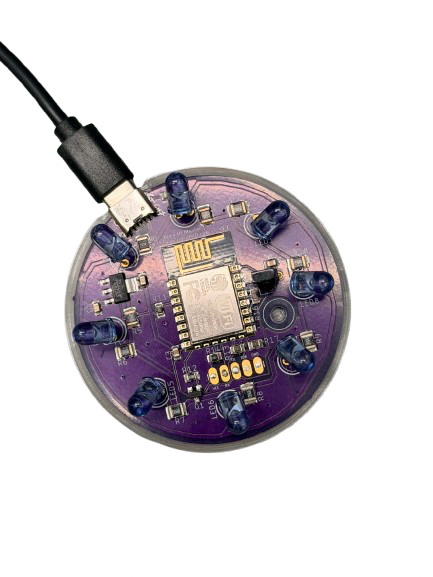
Top View

Angled View
The OpenIRBlaster is built on a custom PCB that I designed and had fabricated. I focused on selecting components that balance affordability with rock-solid reliability, keeping the total build cost around $22-25 without cutting corners on quality. It’s based on the ESP8266 (specifically targeting common dev board footprints) and includes:
- ESP-12F – ESP8266 microcontroller module running ESPHome firmware ($6.95 from Adafruit)
- IR333-A – High-output 940nm IR LEDs for reliable transmission (8x at $0.32 each = $2.56)
- TSOP38238 – 38kHz IR receiver for learning codes from existing remotes ($0.77)
- IRLML6344TRPBF – Logic-level MOSFET for driving all IR LEDs from a single GPIO ($0.49)
- AMS1117-3.3 – Low-dropout 3.3V voltage regulator for stable power (~$0.50)
- Adafruit 4907 – USB-C connector with proper power negotiation circuitry (~$0.30)
- Capacitors and resistors – Standard passives (~$1.50)
- PCB from OSHPark – Custom board (~$9.32 per board, $27.95 for 3)
The PCB design is shared on OSHPark where you can order your own set of boards directly (currently $27.95 for 3 boards): Order OpenIRBlaster PCBs on OSHPark
Getting Started
Everything you need to build your own OpenIRBlaster is available on GitHub:
OpenIRBlaster GitHub Repository
The repository includes:
- ESPHome configuration files
- Custom Home Assistant integration
- Hardware documentation
- Setup and usage instructions
Go Deeper: Project Wiki
Want to really dig into the technical details? The OpenIRBlaster Wiki is your destination for:
- Hardware deep-dive – Schematic walkthrough, component selection rationale, and design decisions
- Build guide – Step-by-step assembly instructions with tips from my own build experience
- Firmware customization – How to modify the ESPHome configuration for your specific needs
- Troubleshooting – Common issues and solutions to get you unstuck
Whether you want to build one exactly as designed or use it as a starting point for your own creation, the wiki has you covered.
Why Open Source? (And Why I’m Sharing This)
Here’s the thing: I wouldn’t be able to build any of this without the incredible Home Assistant and ESPHome communities. Every time I’ve been stuck, someone on the forums or Discord has helped me out. The documentation, the examples, the patience of people answering my questions—I owe a lot to this community.
OpenIRBlaster is my way of giving back. Everything is open source: the hardware designs, the firmware, the Home Assistant integration. Fork it, modify it, improve it, learn from it. That’s the whole point.
And selfishly? I’m hoping some of you will make it even better and share those improvements back. That’s the beauty of open source—we all win.
What’s Next? (Join Me!)
This project is very much a work in progress, and I’d love for you to be part of it. Here’s how you can get involved:
- Build one! Seriously, that’s the best feedback. Let me know what works and what doesn’t.
- Found a bug? Open an issue on GitHub. I promise I read them all.
- Got an idea? Feature requests are welcome—some of the best improvements will surely come from the community!
- Want to contribute code? PRs are absolutely welcome. The codebase is well-documented (I hope!).
I’m also considering doing a small batch of pre-assembled units if there’s enough interest—drop a comment below if that’s something you’d want.
I’m probably being dense, but….
A tutorial on emitting codes between blasters would be useful
– a code received on one blaster repeated on other units (inter-room repeating)
– emitting individual codes on blasters other than the one which had learned that code
Perhaps a virtual device for each remote and its associated codeset?
Hi! I‘d be interested in a pre-assembled board 🙂 Kind regards!